
Autumn in the garden means bulb planting! Bulbs are surprisingly easy to grow, and with a bit of TLC will reward you with a spectacular show of spring colour. Follow our step-by-step guide to planting bulbs.

STEP 1: KEEP YOUR BULBS COOL
Bulbs like to be planted in cool soil. If the weather isn’t cool enough (between 13 and 23 degrees Celsius), store your bulbs in your fridge’s crisper section, in an egg carton or paper bag. Never store your bulbs in plastic, or they will sweat and rot.
Also, don’t put your bulbs in the crisper with fruit, as the gases released by the fruit will ruin your bulbs. It’s a good idea to label the container they’re in clearly so you can be sure no one mistakes them for onions, or your next batch of spaghetti Bolognese could be lethal.
Quick tip: Regardless of the weather, tulips, hyacinth and daffodils need refrigeration, but for no longer than six weeks. This tip also applies to bulbs that you have dug out of the ground (after they’ve finished flowering and foliage has died off). Just make sure to dry the bulbs out first before you refrigerate them.
STEP 2: FIND A SPOT TO PLANT YOUR BULBS
The great thing about bulbs is that they’re happy almost anywhere, provided they get full or part sun. If in doubt, read the bulb packet instructions.
Planting bulbs in a pot gives you the chance to bring them indoors once in flower.
STEP 3: PREPARE SOIL FOR PLANTING
If planting in the ground, prepare your soil by clearing weeds and rocks, then dig the soil over until it’s fine and crumbly, to at least the depth of your spade.
Free-draining soil is a must, as soggy bulbs will rot. Whether planting in the ground or in a pot, a good quality bulb-growing mix added to the soil will improve drainage. For a soil boost, dig in a couple of shovelfuls of aged cow or chook manure or compost per square metre.
STEP 4: HOW TO PLANT BULBS
Planting depth depends on the bulb, so check bulb packet instructions. A handy rule of thumb is to plant bulbs at a depth equal to twice their width. Bulbs planted too deeply will run out of energy before they reach the surface. Bulbs planted too shallow may be uprooted by birds. Consider using a bulb planter to help get the depth just right.
Space bulbs at least twice the bulb’s own width apart.
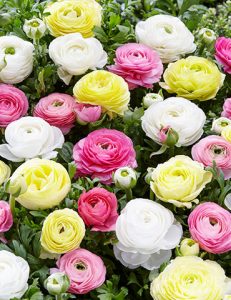
Most bulbs are planted pointy end up (growing tip). The exceptions are anemones and ranunculus which should be planted point down, as their point is the root. Don’t forget to mark the spot where you’ve planted your bulbs too.
STEP 5: WATERING YOUR BULBS
After planting, water in your bulbs well, then water regularly to keep the soil moist, but not wet.
Water deeply again when shoots appear.
STEP 6: MULCHING AND FEEDING
Spread a 25mm layer of organic mulch to keep your bulbs cool. We love Organic Sugar Cane Mulch.
Bulbs come pre-packed with beauty and life, cleverly storing their own nutrients – but you can help them along. As foliage pops up through the soil, apply liquid fertiliser every two weeks. After flowering, feed bulbs with a controlled-release fertiliser. A specialised bulb food, such as Gardeners Advantage Long Lasting Bulb Fertiliser, is ideal.
We have bulb fertiliser, bulb planters and plenty of varieties in stock now. Come check out some of the gorgeous, coloured freesias, daffodils, baby Gladioli, Ranunculi, Dutch Iris and more! Can spring be far behind?
Wingham Nursery & Florist
Find us on Facebook
02 65534570